DIY: Tips for Customizing IKEA Cabinets
written by Melissa Dalton
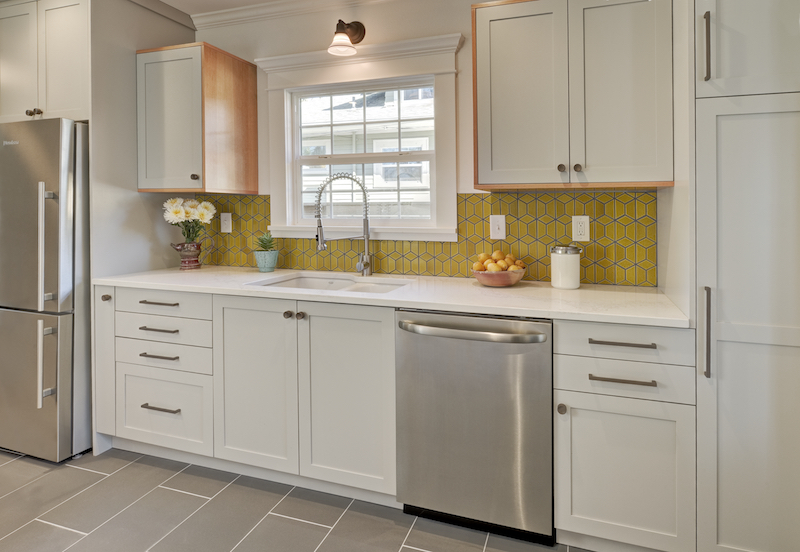
Anyone who has ever attempted to remodel a kitchen knows this universal truth: new cabinets add up fast. That’s why the Portland-based Kokeena offers custom cabinet fronts and casework for modular IKEA systems—customers get a tailored look that’s much easier on the budget.
Kokeena’s products are made-to-order, manufactured in Oregon, and come in three different finishes, including painted wood, veneered wood or textured laminate. We asked Kokeena CEO Russell Edwards and architect Jeff Stern for tips on making a Kokeena/IKEA pairing work in your home.
#1 DON’T ISOLATE THE KITCHEN
“Try to make sure that any kitchen you’re planning is really cohesive with your whole house,” Edwards suggested. For instance, choose a Shaker door with an ogee detail for a historic English or Colonial-style home, or opt for a simple slab front in a Mid-century remodel or modern abode.
#2 WEIGH THE PROS AND CONS
Each finish wears differently, so select one that suits your lifestyle and maintenance requirements. Laminate is considered the most durable, so it can work well for homes with pets or rowdy children. A veneered wood cabinet is “fairly durable and can be repaired up to a point, such as if it were scratched,” Edwards said. Lastly, a painted wood front is less durable, yet can be readily fixed with wood filler or a new coat of paint.
#3 MIND THE GAPS
Using a modular cabinet system like IKEA means that you’re limited to available sizes, which can be a bit like a game of Tetris when working with a particular space. Filler strips are separate finished panels that cover any gaps between cupboards, or a cabinet and wall. Stern thoughtfully planned the width of fillers in the Portland project. “We adjusted the dimensions very carefully so that we eliminated having really large filler strips,” he said. “The reveals at the edges of runs of cabinets were consistent and small, so I think that helps them look custom.”


