
Home + Design

Wine rack with gallery rails for storing bottles and glasses in a stylish home bar. Features multiple horizontal rails and a decorative background, ideal for wine enthusiasts and interior design.

DIY Wine Rack with Gallery Rails

written by Melissa Dalton | illustration by Allison Bye This project is an attractive way to display your wine bottles. It uses a basic floating shelf design and adds a decorative backing board for stabilization, as well as gallery rails. The rails ensure the bottles don’t roll off the shelves. The best part of this project is that it’s a template for your own personal style. For instance, if the slat application described here is too modern, the backing decoration could be wallpaper or a nice stained wood. Depending on the hardware purchased, the gallery rails could be brass or a colored metal. 1. PREPARE THE BACKING BOARD Instead of attaching the shelves directly to the wall, they will be attached to a backing board for support, using ¾” plywood. Cut the plywood to size, about 20 inches wide by 30 inches tall. These dimensions can be tweaked to your…

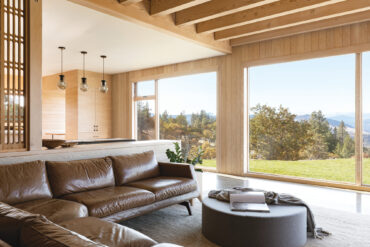
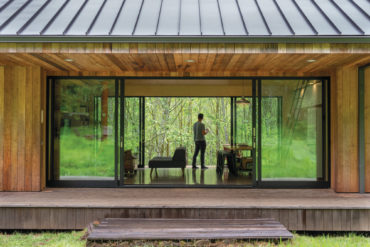
Spacious interior featuring comfortable seating, natural light, and a seamless connection to the outdoor landscape, embodying new horizons in home design.

Willamette Valley Winemakers Remodel Historic Vineyard Home

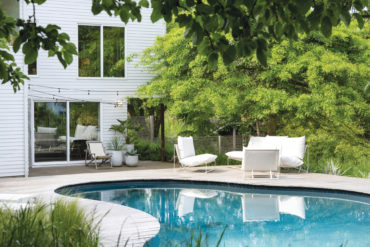
After twenty years in their beloved home, these Willamette Valley winemakers crafted a remodel to befit their next steps written by Melissa Dalton | photography by George Barberis/Green Hammer Adam Campbell grew up among the vines. His parents, Pat and Joe Campbell, are the founders of Elk Cove Vineyards, planting their first grapes in 1974 on a property in Gaston. “Growing up there with my parents, it was an all-hands-on-deck family business,” said Adam, and he has the old family photos to prove it. They show him, along with his four siblings, doing things like watering the plants, crushing grapes and helping out every summer well into their adolescence. It’s no wonder then, that by 1995, Adam was hooked on the winemaking business, and officially joined the company. Ten years later, when it came time to buy a house with his wife, Caroline, they picked a historic vineyard ten minutes…

A family and friends gather around a backyard fire pit, roasting marshmallows and enjoying a warm evening outdoors. The scene highlights outdoor living, fire pit construction, and socializing in Orego.

How to Build a Backyard Fire Pit

written by Melissa Dalton | illustration by Chamisa Kellogg In 1977, an architectural handbook called A Pattern Language decreed: “There is no substitute for fire. Build the fire in a common space … where it provides a natural focus for talk and dreams and thought.” While this refers to an indoor fireplace, we can also apply it to the backyard. Here are our tips to build an outdoor fire pit—a surprisingly easy weekend project when you have the right materials. 1 PICK A SPOT Before starting, always check local regulations about what is allowed in your jurisdiction. General guidelines are wide-ranging, and suggest a spot anywhere from 10 to 25 feet away from any structures or trees. Make sure there is a water source close at hand, the ground is level and utilities have been identified before digging. 2 CHOOSE THE SIZE, SHAPE AND MATERIALS At minimum, the pit should…

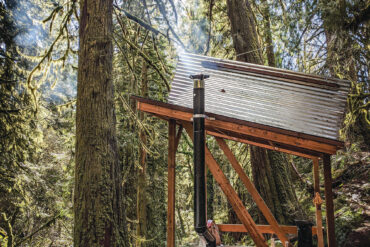
A cozy A-frame cabin in Oregon's wilderness during sunset, surrounded by trees and open grassy fields, with a person sitting on a bench outside, capturing the serene mountain landscape.

Tiny A-Frame Cabins on Wheels

In Sisters, a trio of friends produce tiny A-frames on wheels so people can get closer to nature written by Melissa Dalton Some founders come up with their startup idea in a garage. Dylan Woock and Alex Zelaya were camping in the Pacific Northwest woods. “We had spent a ton of time backpacking and sharing a tent on these epic trips out to the Wallowas in Eastern Oregon, or up to Washington, and we were pretty burned out on our respective career paths,” remembered Woock. The two had met in college at the University of Oregon, and by 2019, Woock was working as an architectural designer in Portland, while Zelaya was getting his MBA. On one of their excursions, they asked themselves: “What if we created a product for the masses that allowed people to get outside, out to these really beautiful places that we’re experiencing?” And so, their company,…

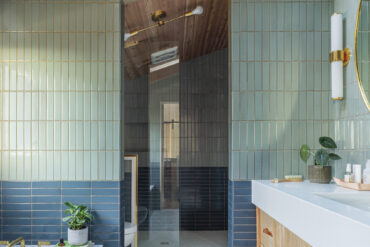
A 1902 bathroom in Willamette Heights gets a handsome makeover that improves space utility.

Three Bathrooms, One Designer

Interior Designer Holly Freres of JHL Design in Portland takes us through three creative bathroom designs written by Melissa Dalton | photography by JHL Design When it comes to designing bathrooms, Holly Freres likes to sweat the small stuff. “I love doing bathrooms,” said Freres, interior designer and principal at the Portland-based JHL Design. “There’s a lot of details that go into their design, whether it’s the lumens of the vanity sconces, the size of the drawers or the clearances.” She walks us through three notable projects, including her own home. WILLAMETTE HEIGHTS Modern Classic Old house owners often love the historic details in their homes, but not the outdated function. Such was the case for this primary bathroom in this 1902 home in Portland’s Willamette Heights neighborhood. “Like a lot of old homes, all of the bathrooms were quite small,” said Freres. The biggest challenge was to maintain the…

With a picture frame molding accent wall, scale and pattern are important.

DIY Picture Molding for Plain Walls

Try out this fun weekend project to add dimension to plain drywall. 1 GET YOUR PARAMETERS Start by taking measurements of the chosen wall to ascertain the available space for the picture molding boxes. Identify places on the wall where the picture molding can’t go, such as electrical outlets, light switches, baseboard and window or door frames. Sketch this elevation to scale, either on paper or in digital software. 2 PLEASING PROPORTIONS This is potentially the most difficult part of the project—getting the number and proportions of the picture molding boxes right! Think about the wall as a grid with rows and columns, and start sketching out possible layouts. While mapping this, keep in mind the key elements that will affect the final look: repetition and asymmetry. An odd number of rows and columns will look best. When the layout is complete in 2D, use a pencil and a large…

A cozy indoor garden scene featuring an easel-style shelf holding multiple potted plants, including succulents and cacti, with natural light from a nearby window, capturing the essence of Oregon lifestyle and gardening culture.

DIY Cedar A-Frame Plant Stand

illustration by Charla Pettingill Plant lovers, this one is for you—a weekend woodworking project that packs more plants into one space, courtesy of this simple A-frame plant stand. We’re building it out of cedar, so it can go outside on the patio; however, the shelves are removable and it can fold up (courtesy of carriage bolts), so feel free to put this anywhere. Here are our instructions. 1 MATERIALS We’re opting to build the A-frame supports on either side from four 8-foot-long, cedar 2x4s. There will be eight supports for the shelves, each support measuring a foot long, so you will need one 8-foot-long cedar 1×3. The shelves will require two 8-foot-long, cedar 1x12s. Prep the wood, if needed, and give it a light sanding. 2 BUILD THE A-FRAME Cut the 2x4s to 73 inches. Cut the bottom of each leg, where it will be sitting on the ground, at…

DIY Horseshoe Pit

DIY Backyard Horseshoe Pit Guide

illustration by Kate Wong Come summer, we’re ready to play lawn games. Horseshoes are a classic, and a horseshoe pit court can be as simple, or complicated, as you like, as well as a straightforward weekend project to build. Here are our tips: 1. PLOT THE COURT A regulation court requires the metal stakes to be 40 feet apart. To keep this simple, measure the distance across a relatively flat plane, and pound a metal stake in the ground at either end. However, to create a cushioned area for the horseshoes to land, prevent bounce and foster fair play, it’s best to build a pit. Build two pits across from each other, or a single one that players will take turns on. To get really fancy, add a backstop to the pit to contain the flying shoes. 2. PLAN THE PIT Each pit will be 3 x 4 feet, with…

Wood slat accent wall

Build a Wood Slat Accent Wall

illustration by Sophie Barlow It doesn’t look like it, but a wood slat accent wall is a fairly beginner-friendly project. The idea is to create an accent wall in your room of choice—perhaps in an entry or hallway—composed of a series of 1×2 boards. It’s a modern look that adds architectural character, warmth and texture. 1. GATHER WOOD Measure for the accent wall dimensions, getting height and length. This project is based around boards that are listed as 1 inch x 2 inch x 8 feet (or 10 feet, depending on ceiling heights), yet the actual dimensions of the boards will be smaller, about 3/4 inch x 1½ inch. However, since there is about a ½-inch gap between each board, to determine the number of slats needed, just divide the length of the wall (in inches) by two, and add an extra board or two to the cart for mishaps….